How To Create Your PRN Using Maintop 6.1
Main Top is a software used for converting image files to PRN format, which is
compatible with your printer. A PRN file is a generic output file that printers can
understand.
It's important to note that Main Top only accepts the following file types:
Raster: .TIFF, .PSB, .PSD, .JPG
Vector: .EPS, .PDF
1. Open Maintop Software on your desktop
a. The icon is located either on the desktop or pinned to your taskbar.
2. Click File located at the top of the window.
a. This will open a dropdown menu
b. Select New from the list
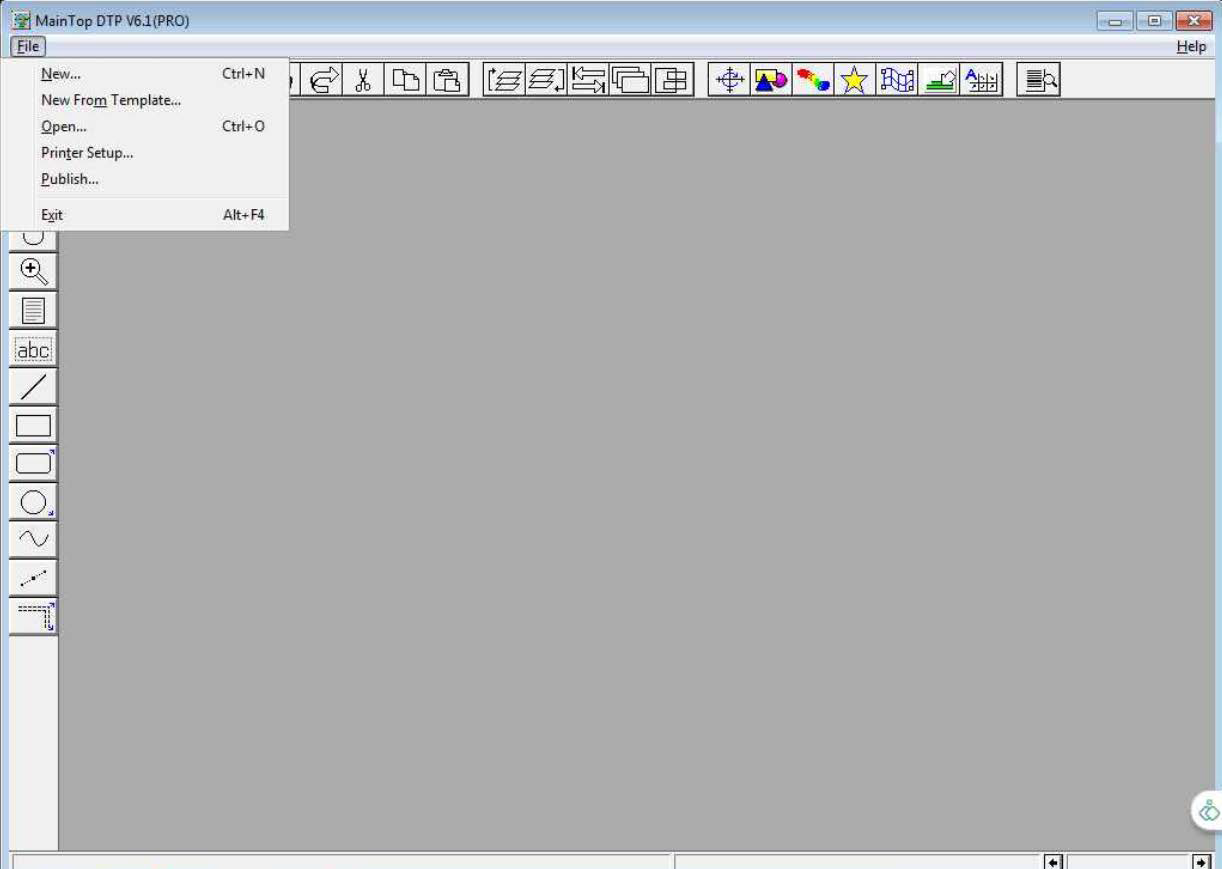
Notes: This creates the new .prn file that will hold your image.
3. Ensure your settings are correct on this Tab
a. Publication Type: General Publication
b. Page: A4
c. Size is not important, this will be adjusted in the following steps.
d. Is your Image orientation Landscape or Portrait
e. Spacing should all be 0mm
f. Single Master Page should be selected
g. Once you have checked these setting select OK
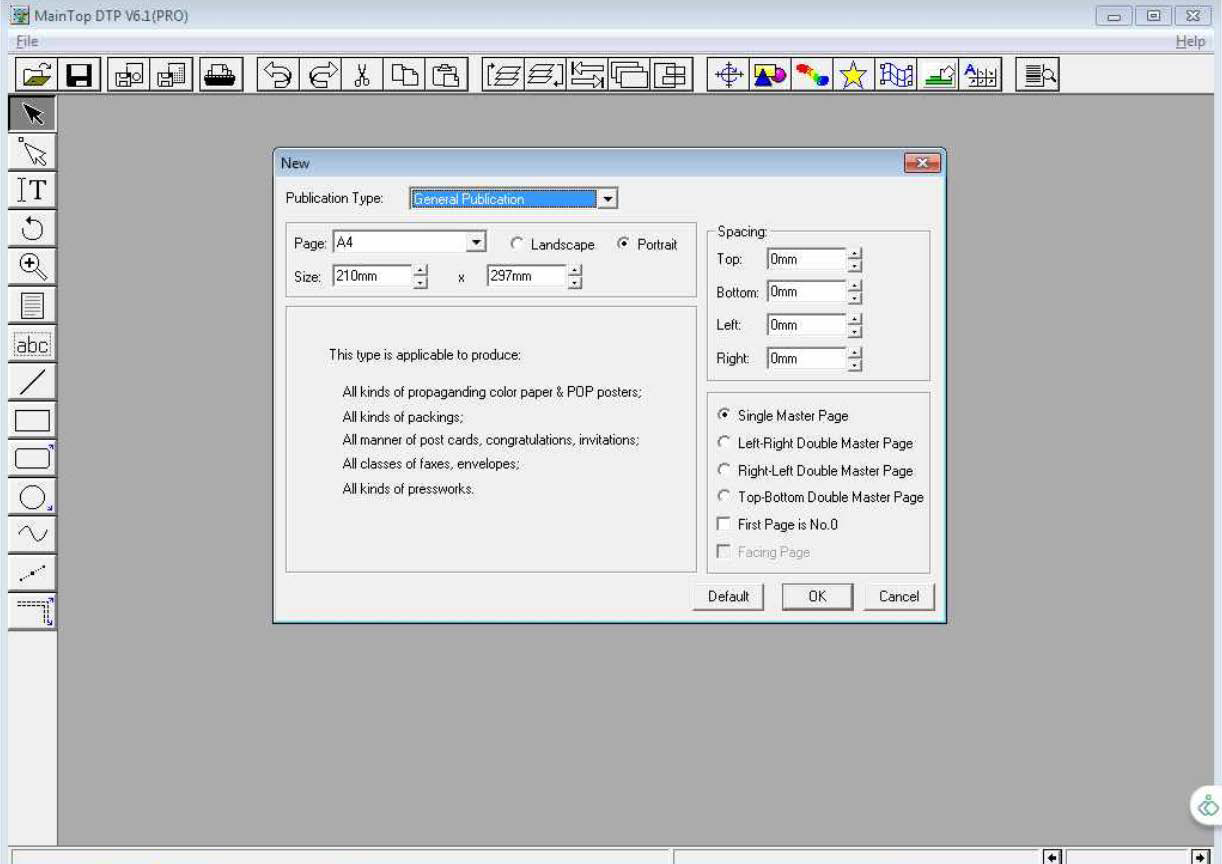
Notes: Your settings should match what you see in the image, with the possible
exception of the orientation.
4. After Selecting OK your window should now have a blank canvas as shown here
a. Select the Import File button
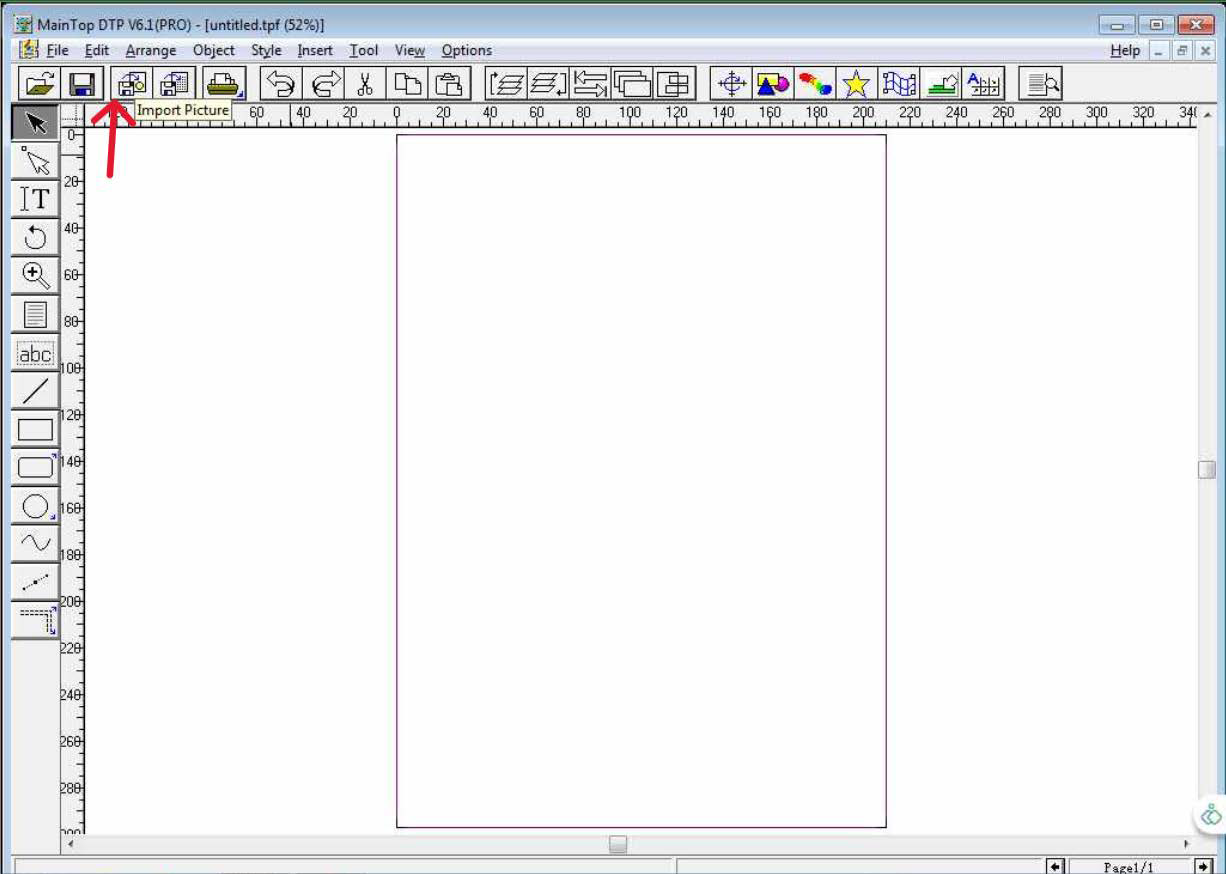
Notes:
• At this point you have created a blank canvas to import your image file.
• Supported file types: .TIFF; .PSB; .PSD; .JPG; .EPS; and .PDF
5. Select the Image file you want to import
a. After you have selected the file click Open
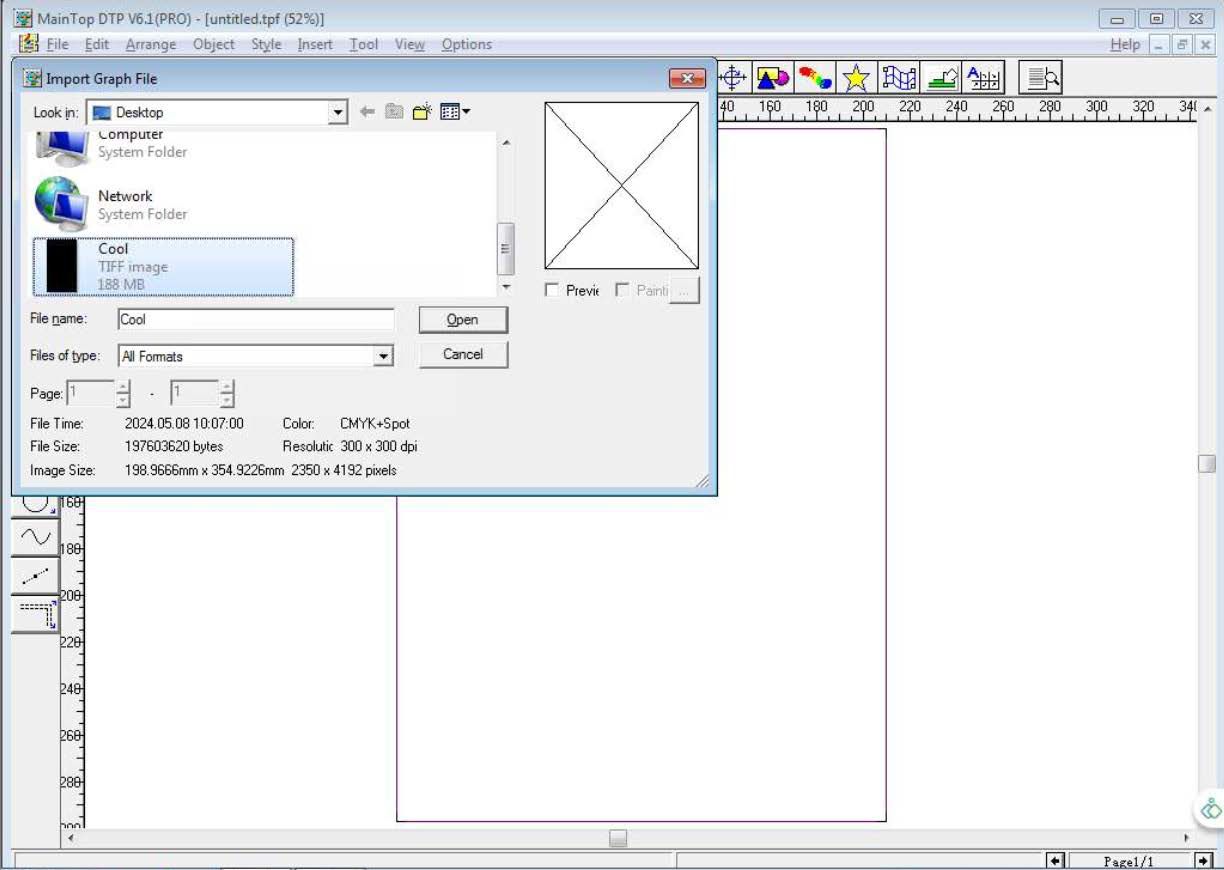
Notes:
• If you do not see your file ensure you are looking in the right directory,using the
dropdown at the top of the window.
6. Import Picture Setting, in this step you can adjust the size of the Image
proportionally by designating either a Width or Height maintaining the images
aspect ratio.
a. Adjust to Picture Size
i. Designate Height - Set the size of the image based on it’s height in mm
ii. Designate Width - Set the size of the image based on it’s width in mm

Notes:
• Adjusting either the width or height the software will maintain image aspect ratio.
7. The image has been imported and resized to your specified settings.
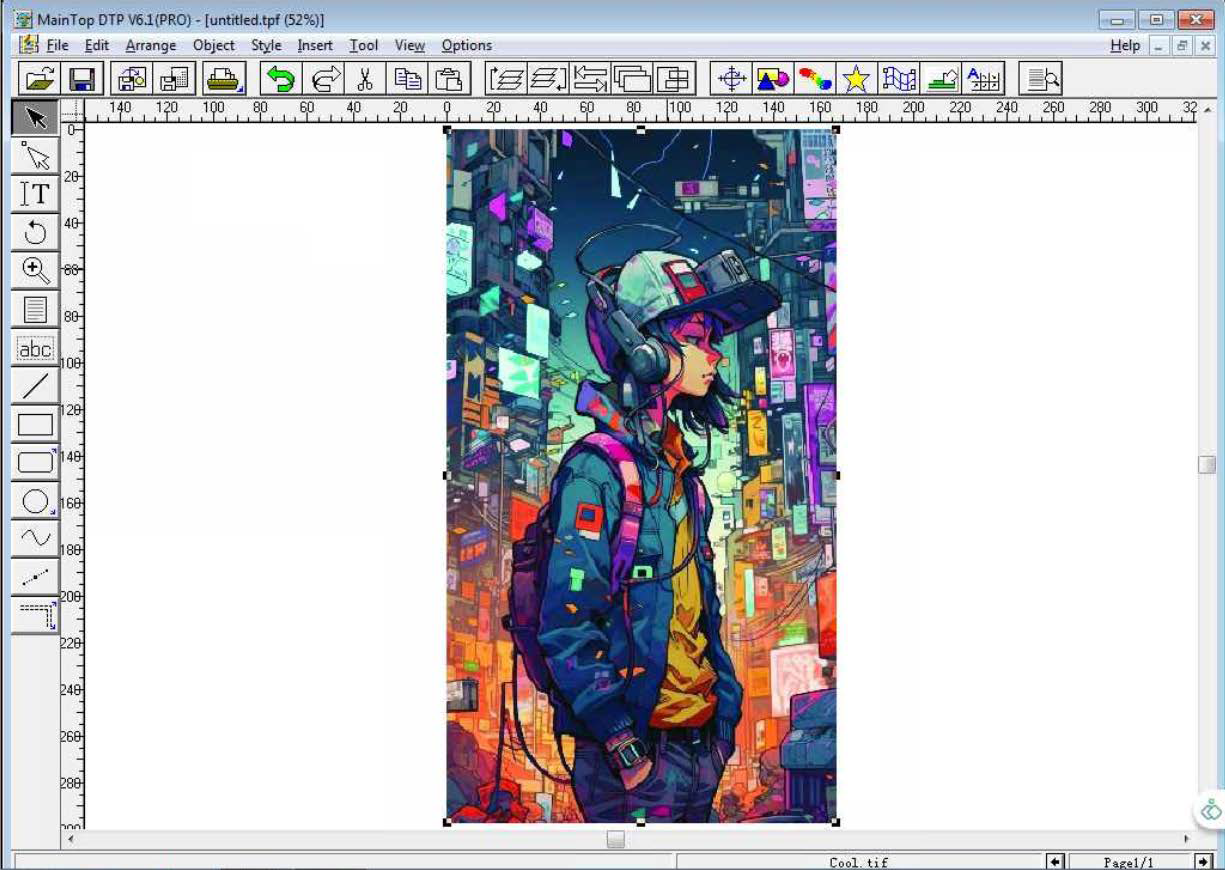
Notes:
• This is only an image preview therefore image quality is not a representation of what is
to be printed.
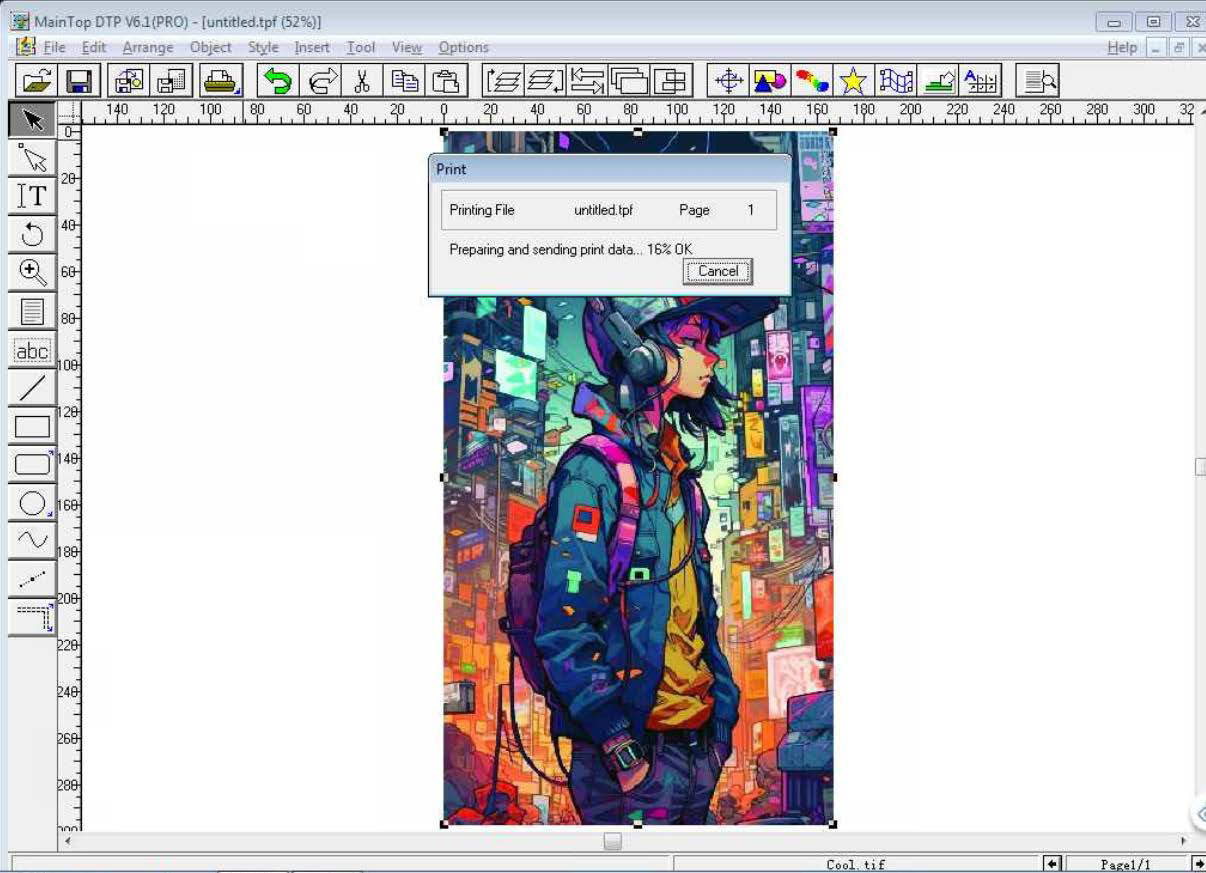
8. Press the Print Button to open the print file dialog window. The button has a printer icon
and is located at the top of the window.
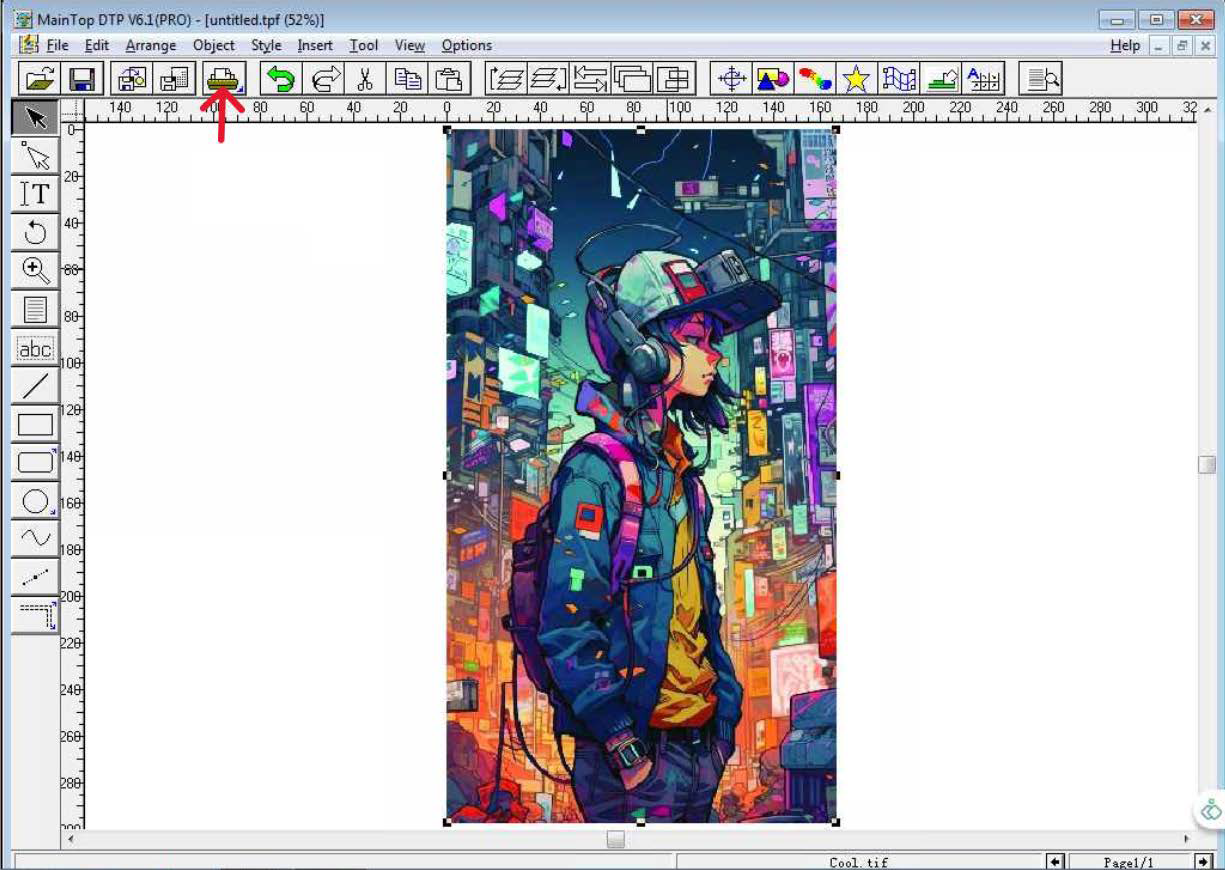
Notes:
• This will open a dialog box to save or print the converted file.
9. Click on properties
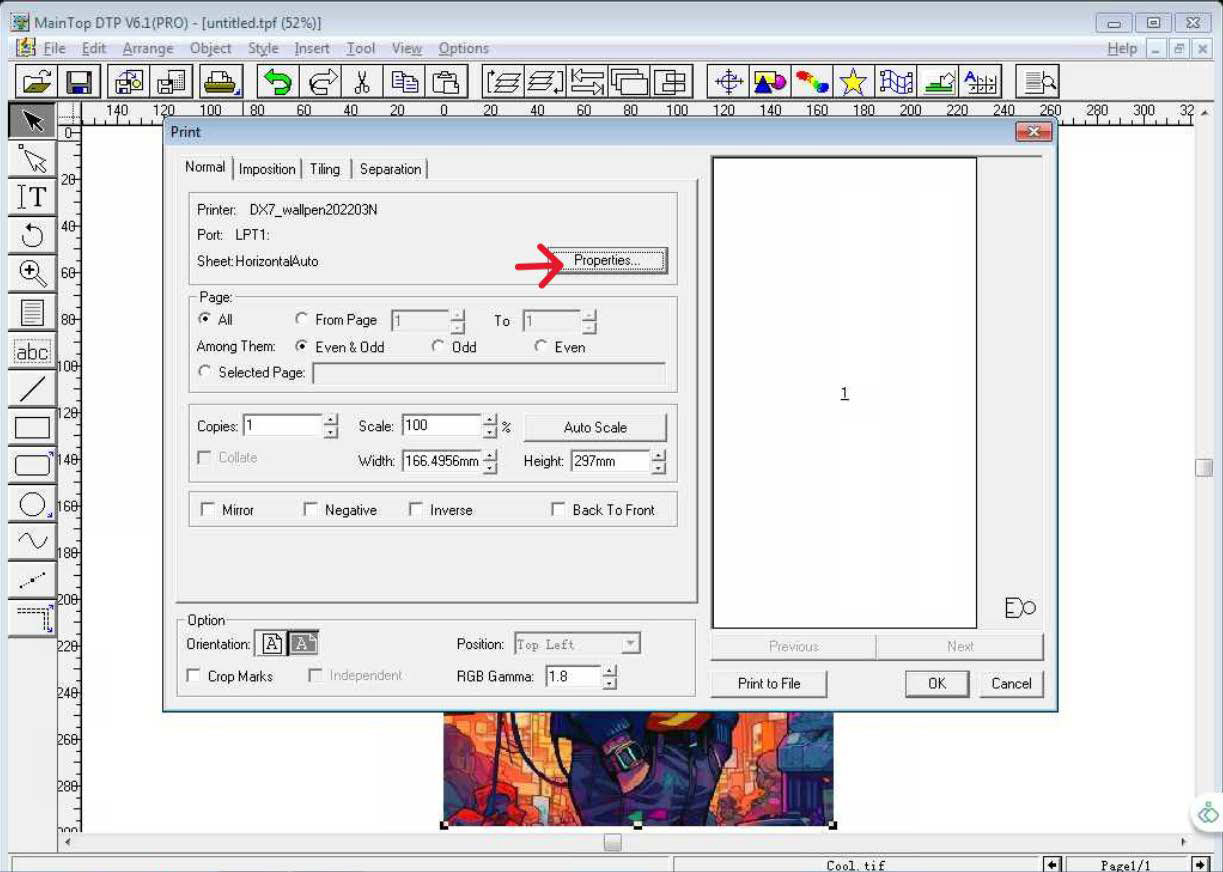
10.Select the desired resolution - either 720x1440 dpi (8pass) or 720x2880 dpi (16pass).
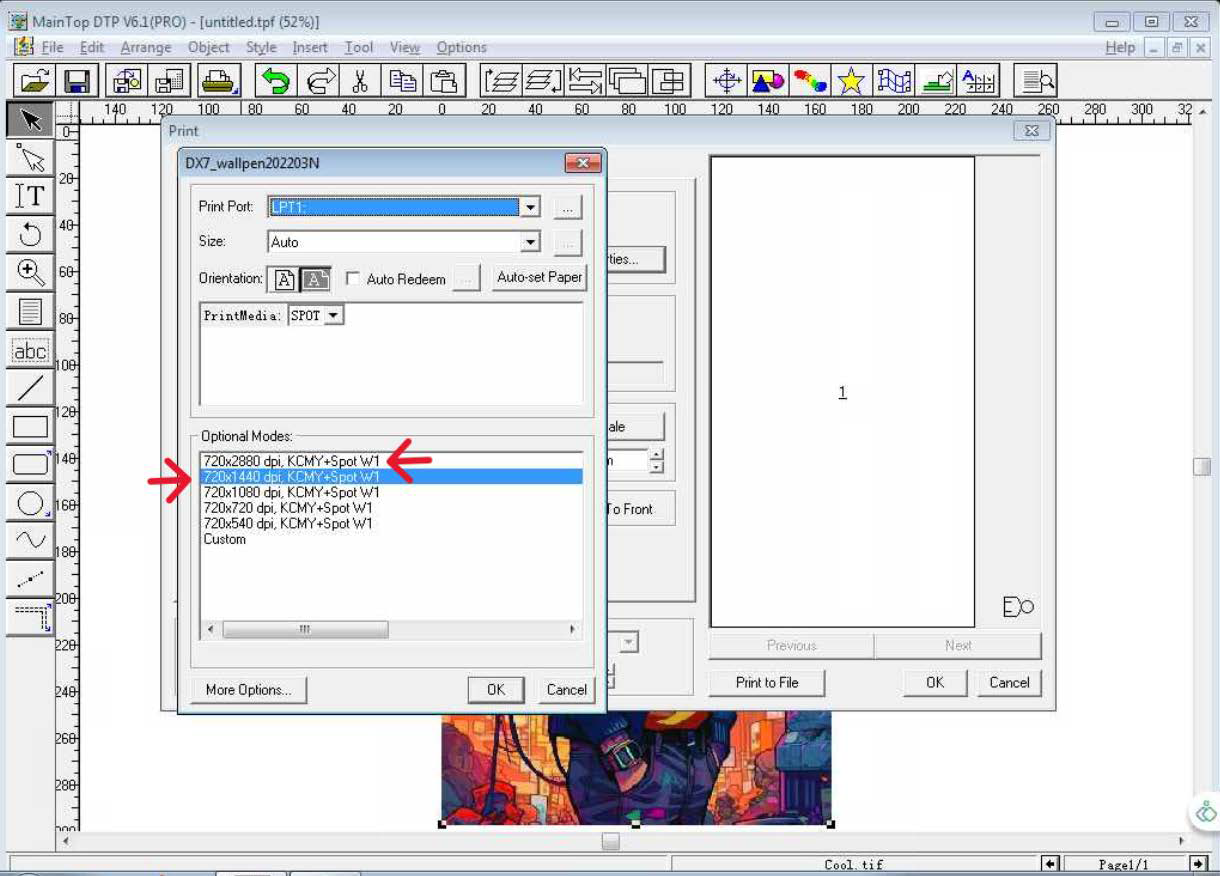
Notes:
• PrintMedia should always be in SPOT;
11. Tap on More Options
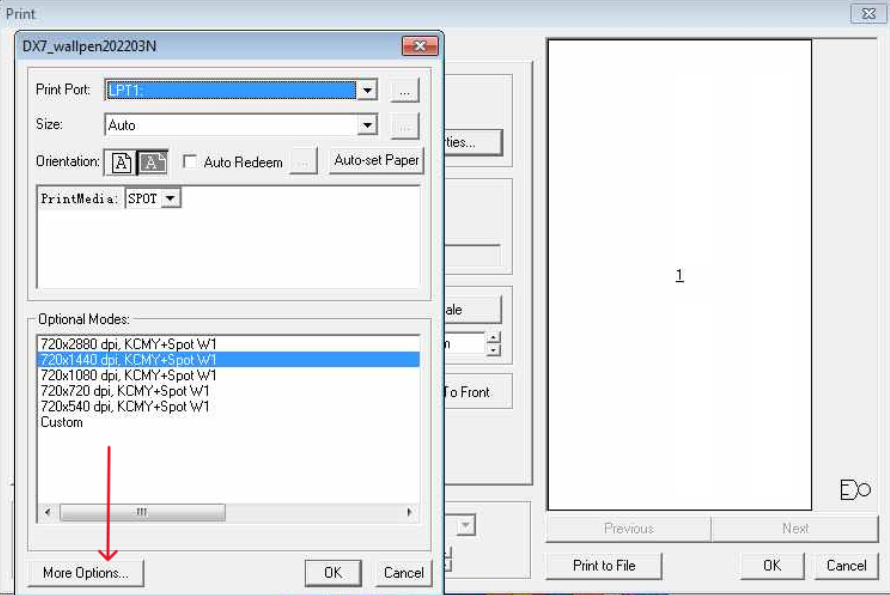
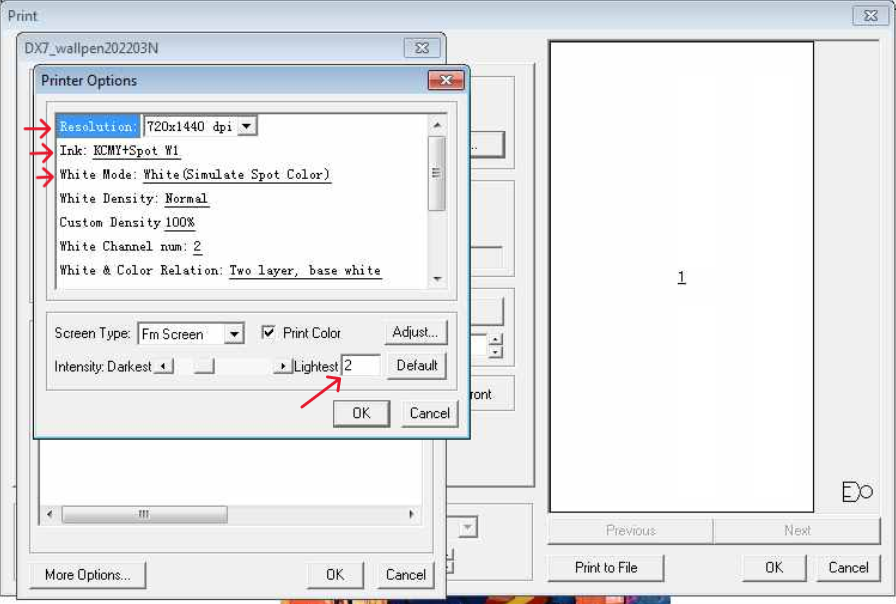
12-Review the following configurations:
a.Select the desired resolution either 720x1440 dpi (8pass) or 720x2880 dpi (10 pass).
b. Choose the ink KCMY+Spot W1.
c. Select white mode as "White (Simulate Spot Color)" and click OK.
d.Intensity should always be set to 2."
e. Tap the OK button again.
13. Tap the "Print to File" button to save the .prn file to your local drive.
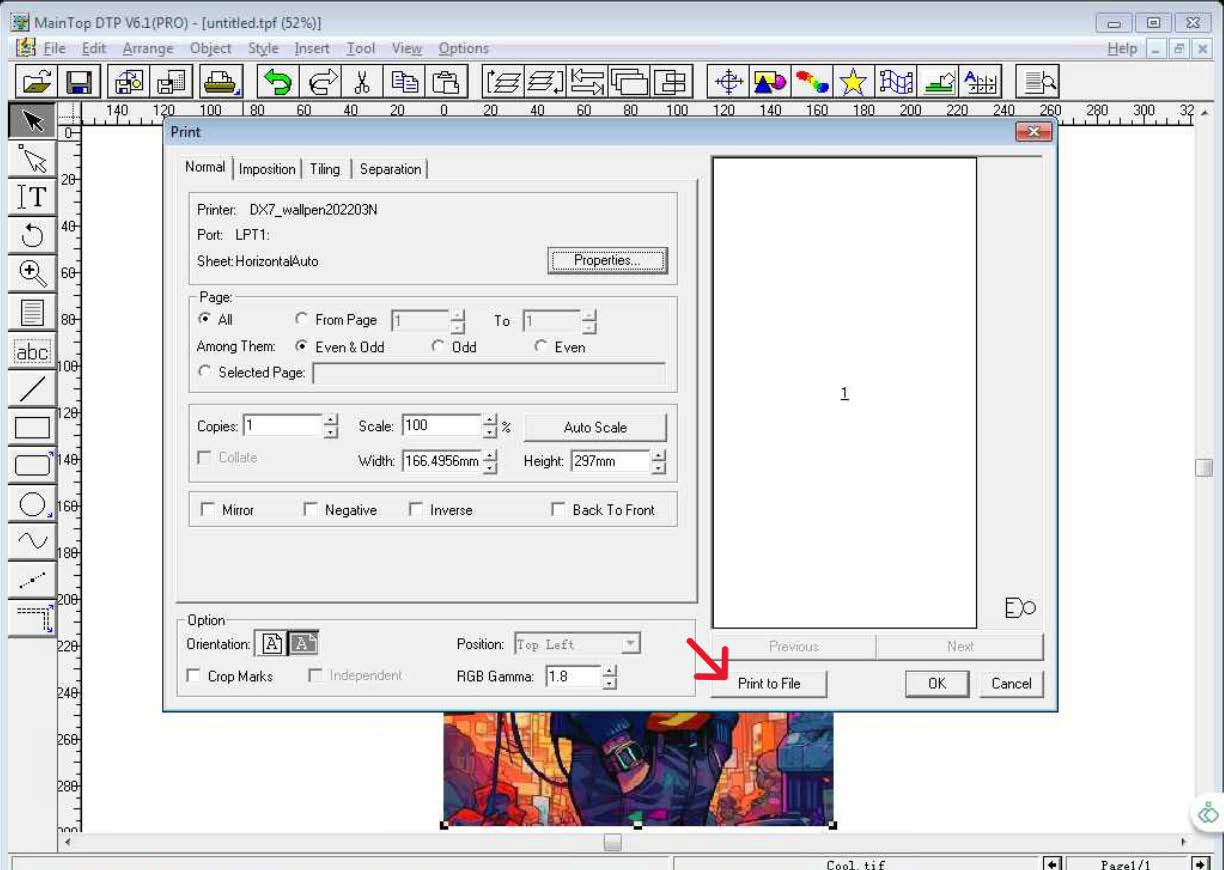
Notes:
• Ensure that the [Save as type:] is set to .prn
Please name your file using only letters and numbers, without special characters.
14. After saving the file information, Maintop will convert your image file to the .prn format. The
image is now ready to be printed.
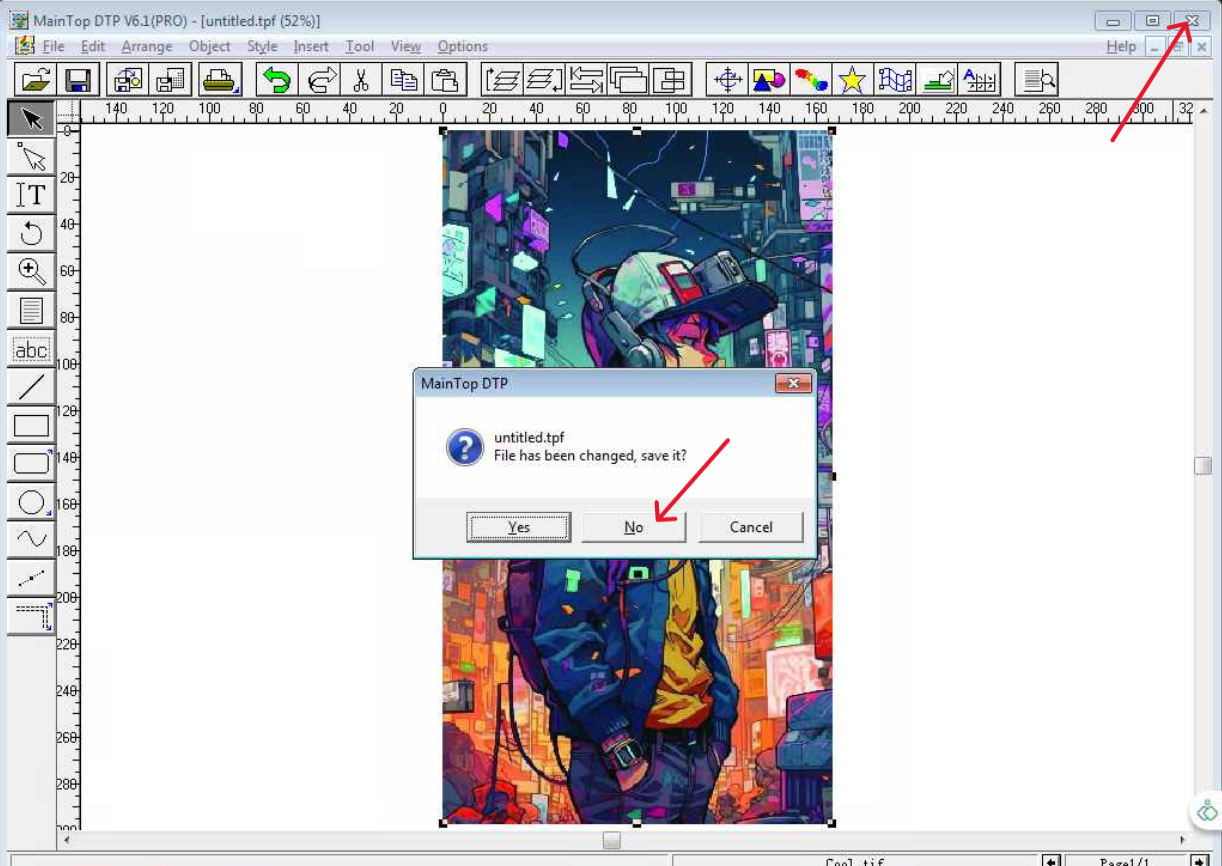
15- To close MainTop, tap on the upper right corner, and then tap on "NO."
Related Articles
WP-UV-T How to Print Using the TWP Software
1. Turn on your computer and printhead assembly 2. Open TWP Operation Software -Look for one of these icons on your desktop area 3. Ensure your image is converted to a `.prn` file using the Main Top software. You can choose between printing with a ...WP-UV-TV2 How to move your printer using a dolly cart
Transporting the WP-UV-T2 requires careful handling to prevent damage to its sensitive components, particularly the motorized belt wheels. Pulling or pushing the printer directly can result in costly damage. Therefore, it is essential to use the ...Eliminating Banding in Your Prints
Banding (also known as striping) is the result of inconsistent laying or curing of ink in your print. The causes of banding are nearly always due to environmental factors. Since banding can be caused by a variety of things, we recommend identifying ...WP-UV-TV2 Diagnosing Clogs - T Series
Diagnosing Clogs It's good to keep in mind that if your printer hasn't been used for a few days, it may experience a clog. This clogging can happen in any part of the delivery system, starting with the ink reservoir nozzles, ink tubing, damper ...WP-UV-T Diagnosing Clogs - T Series
Diagnosing Clogs It's good to keep in mind that if your printer hasn't been used for a few days, it may experience a clog. This clogging can happen in any part of the delivery system, starting with the ink reservoir nozzles, ink tubing, damper ...