WP-UV-T How to Print Using the TWP Software
1. Turn on your computer and printhead assembly
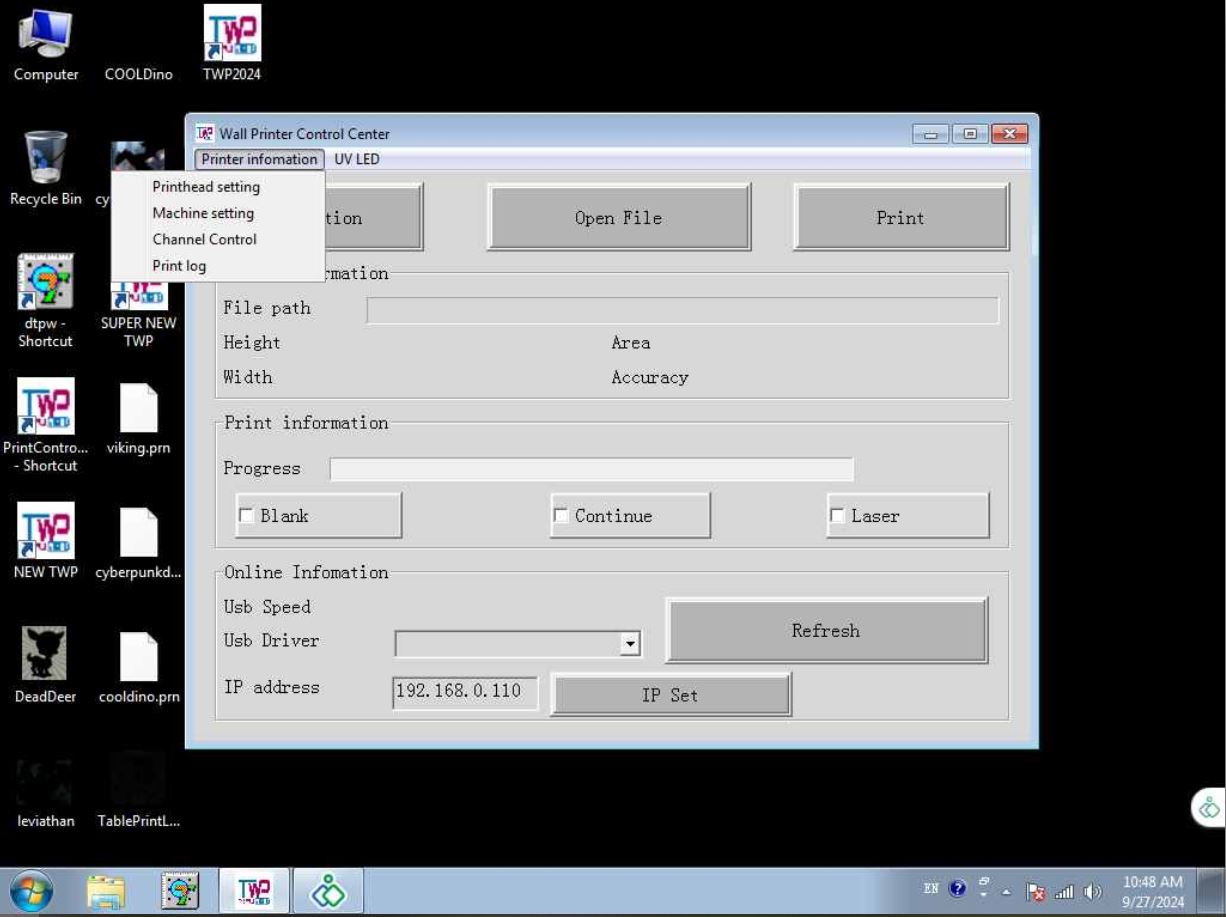
2. Open TWP Operation Software
-Look for one of these icons on your desktop area

3. Ensure your image is converted to a `.prn` file using the Main Top software.
You can choose between printing with a spot channel (white) or no spot channel, tap on Printer Information and then Printhead Settings.
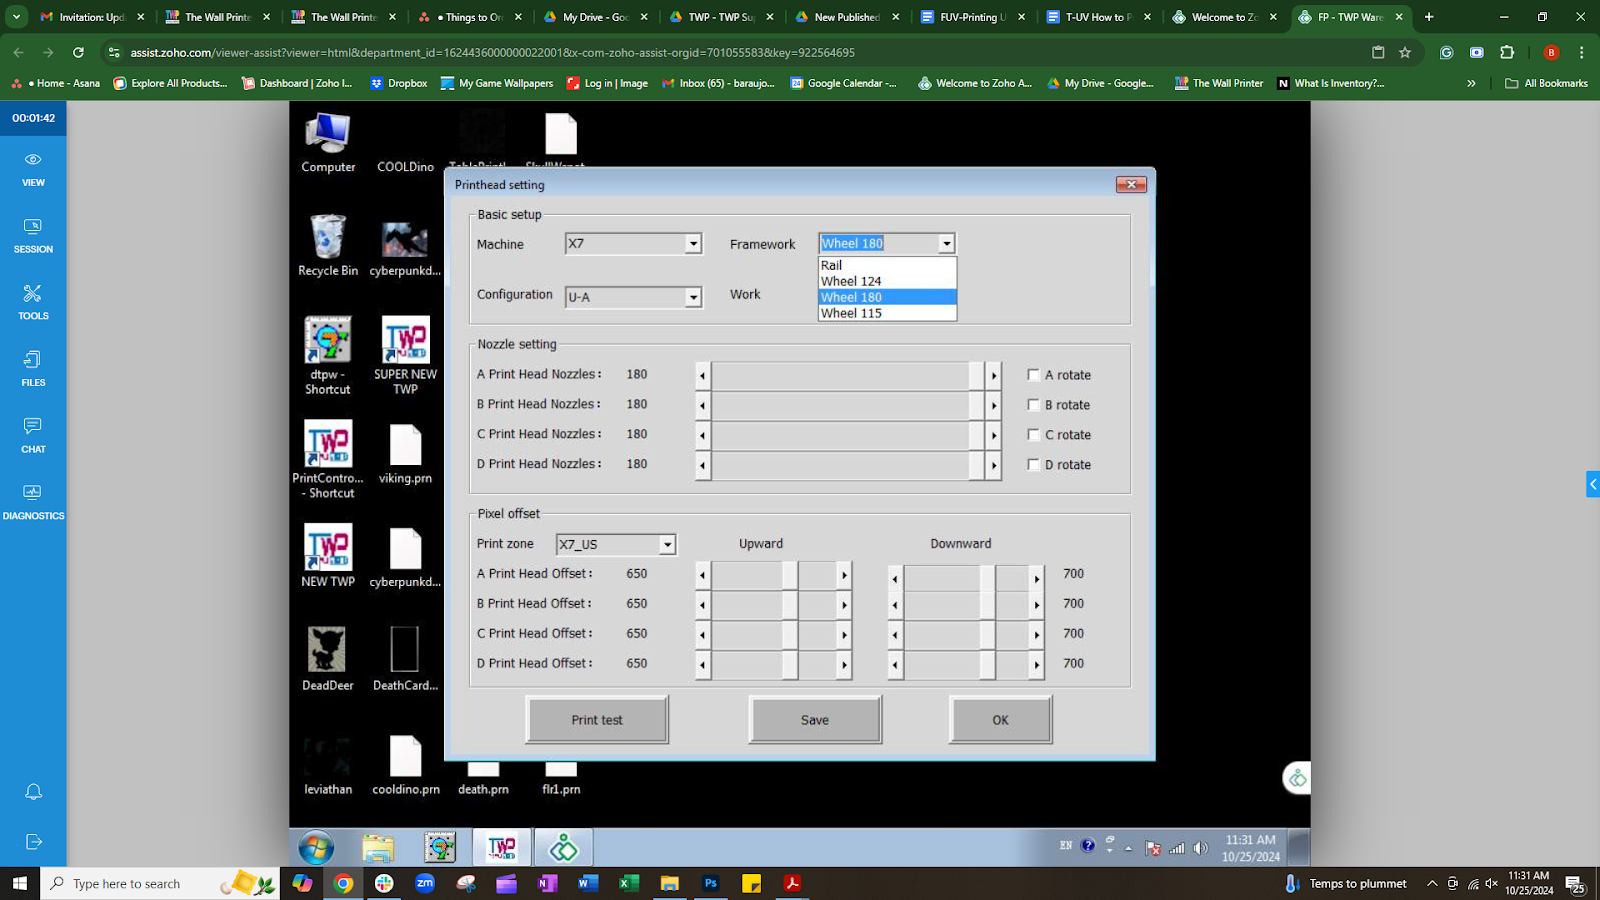
4. In the Work tab, use the drop-down menu to select:
-KCMY: Does not print white
-WKCMY: Prints white first and then the other colors
-KCMYW: Prints white last (used for printing on glass)
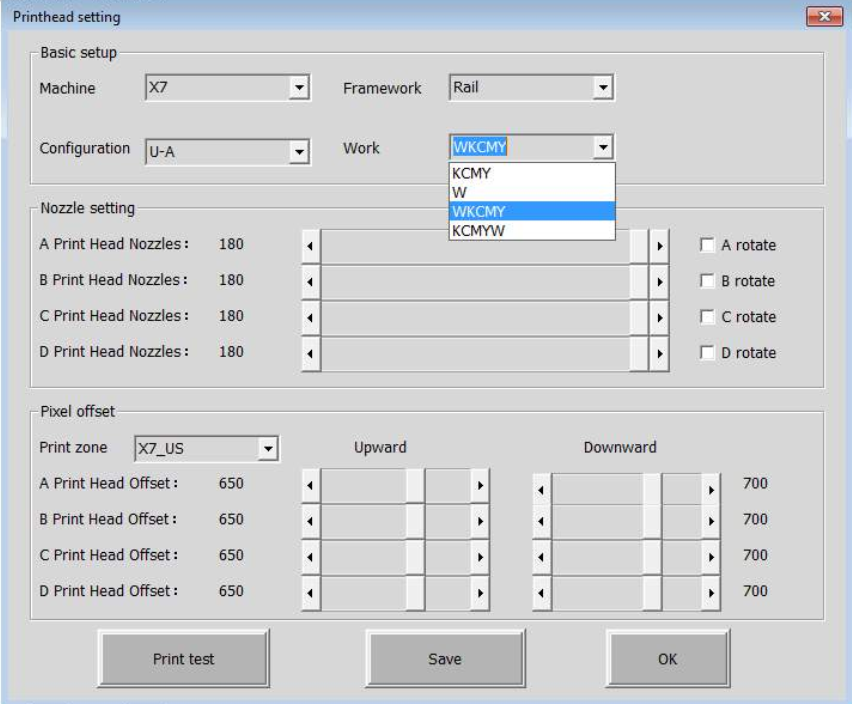
5-In Framework, select the drop-down menu:
-Rail: for printing on rails
-Wheels 124: Not used
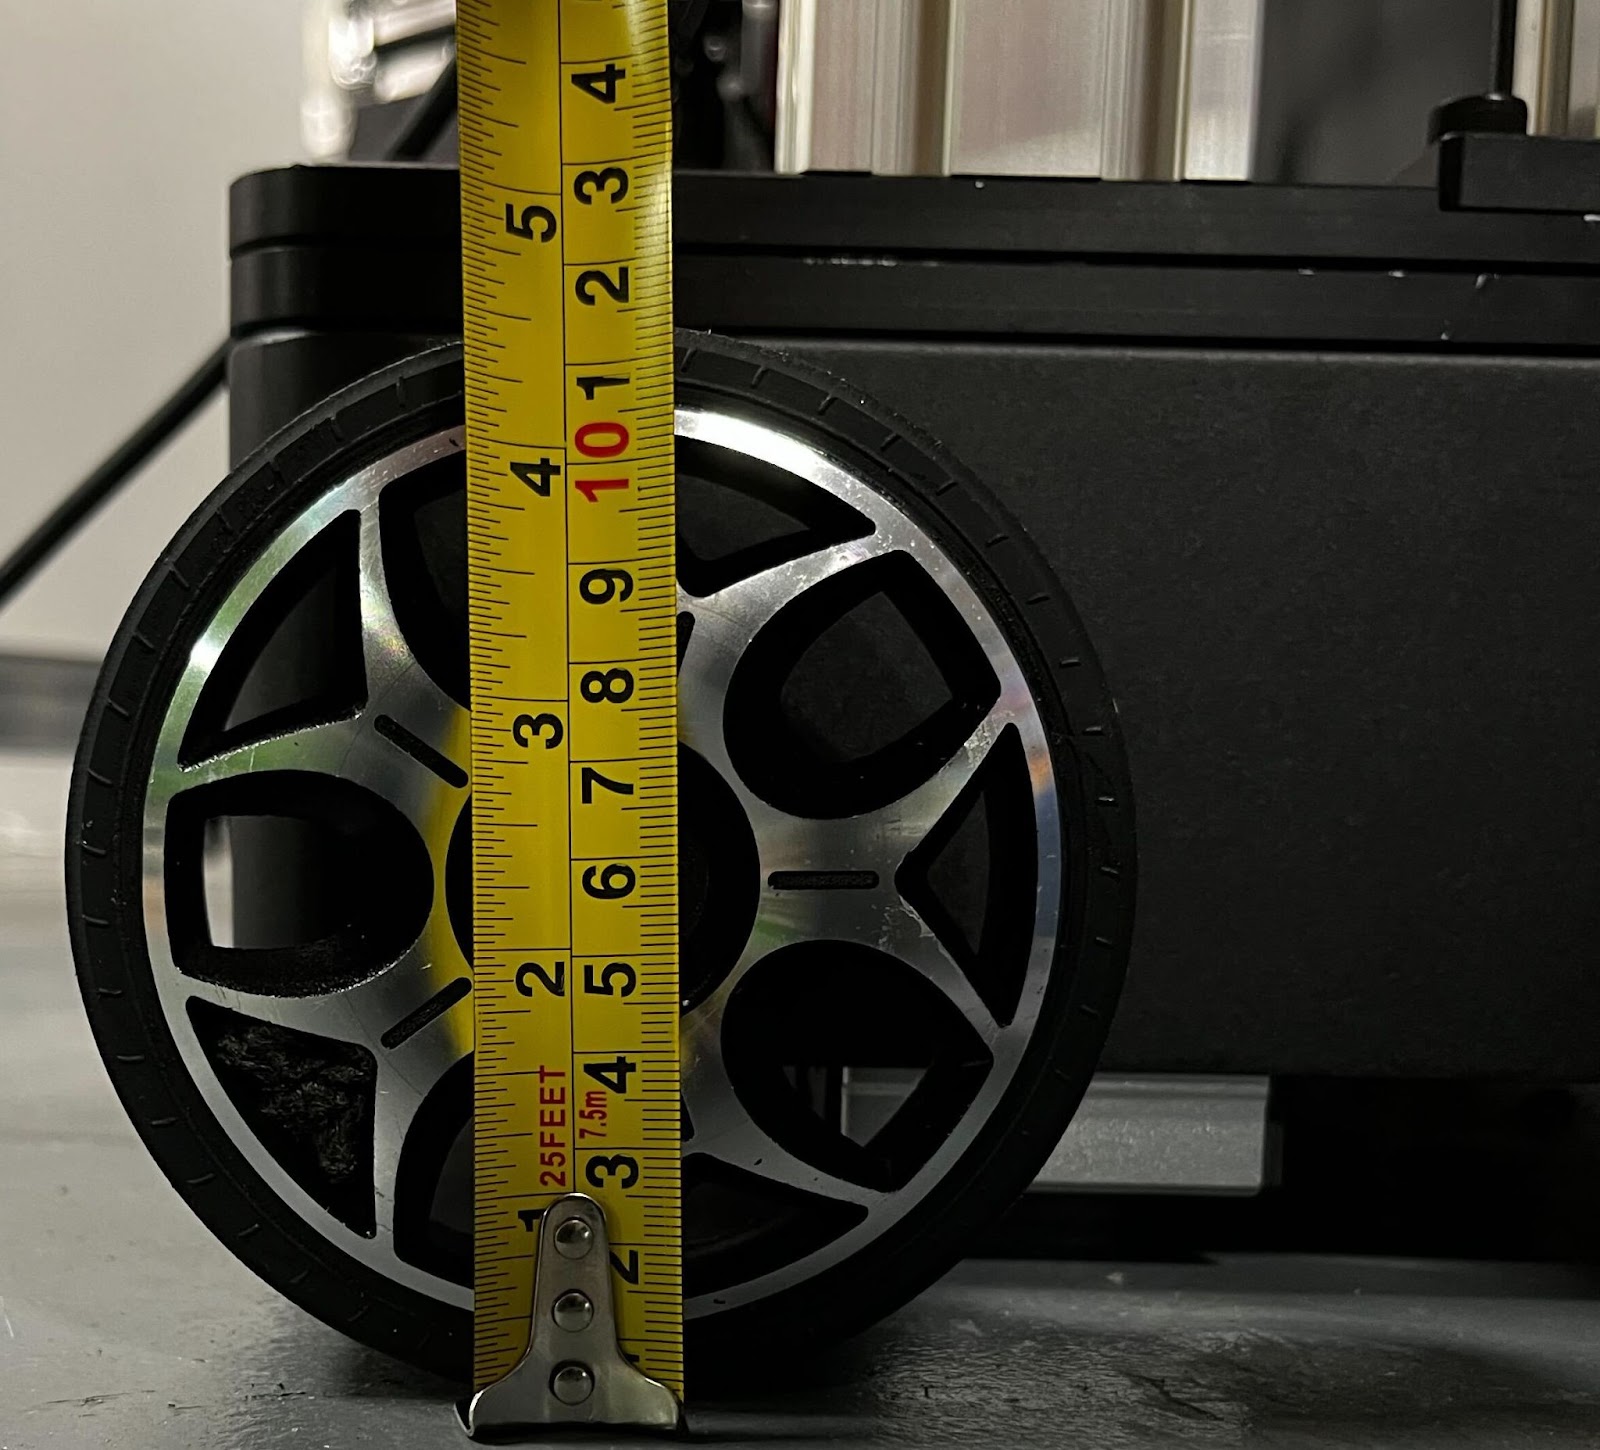
-Wheel 180: For printing on wheels 180mm diameters.
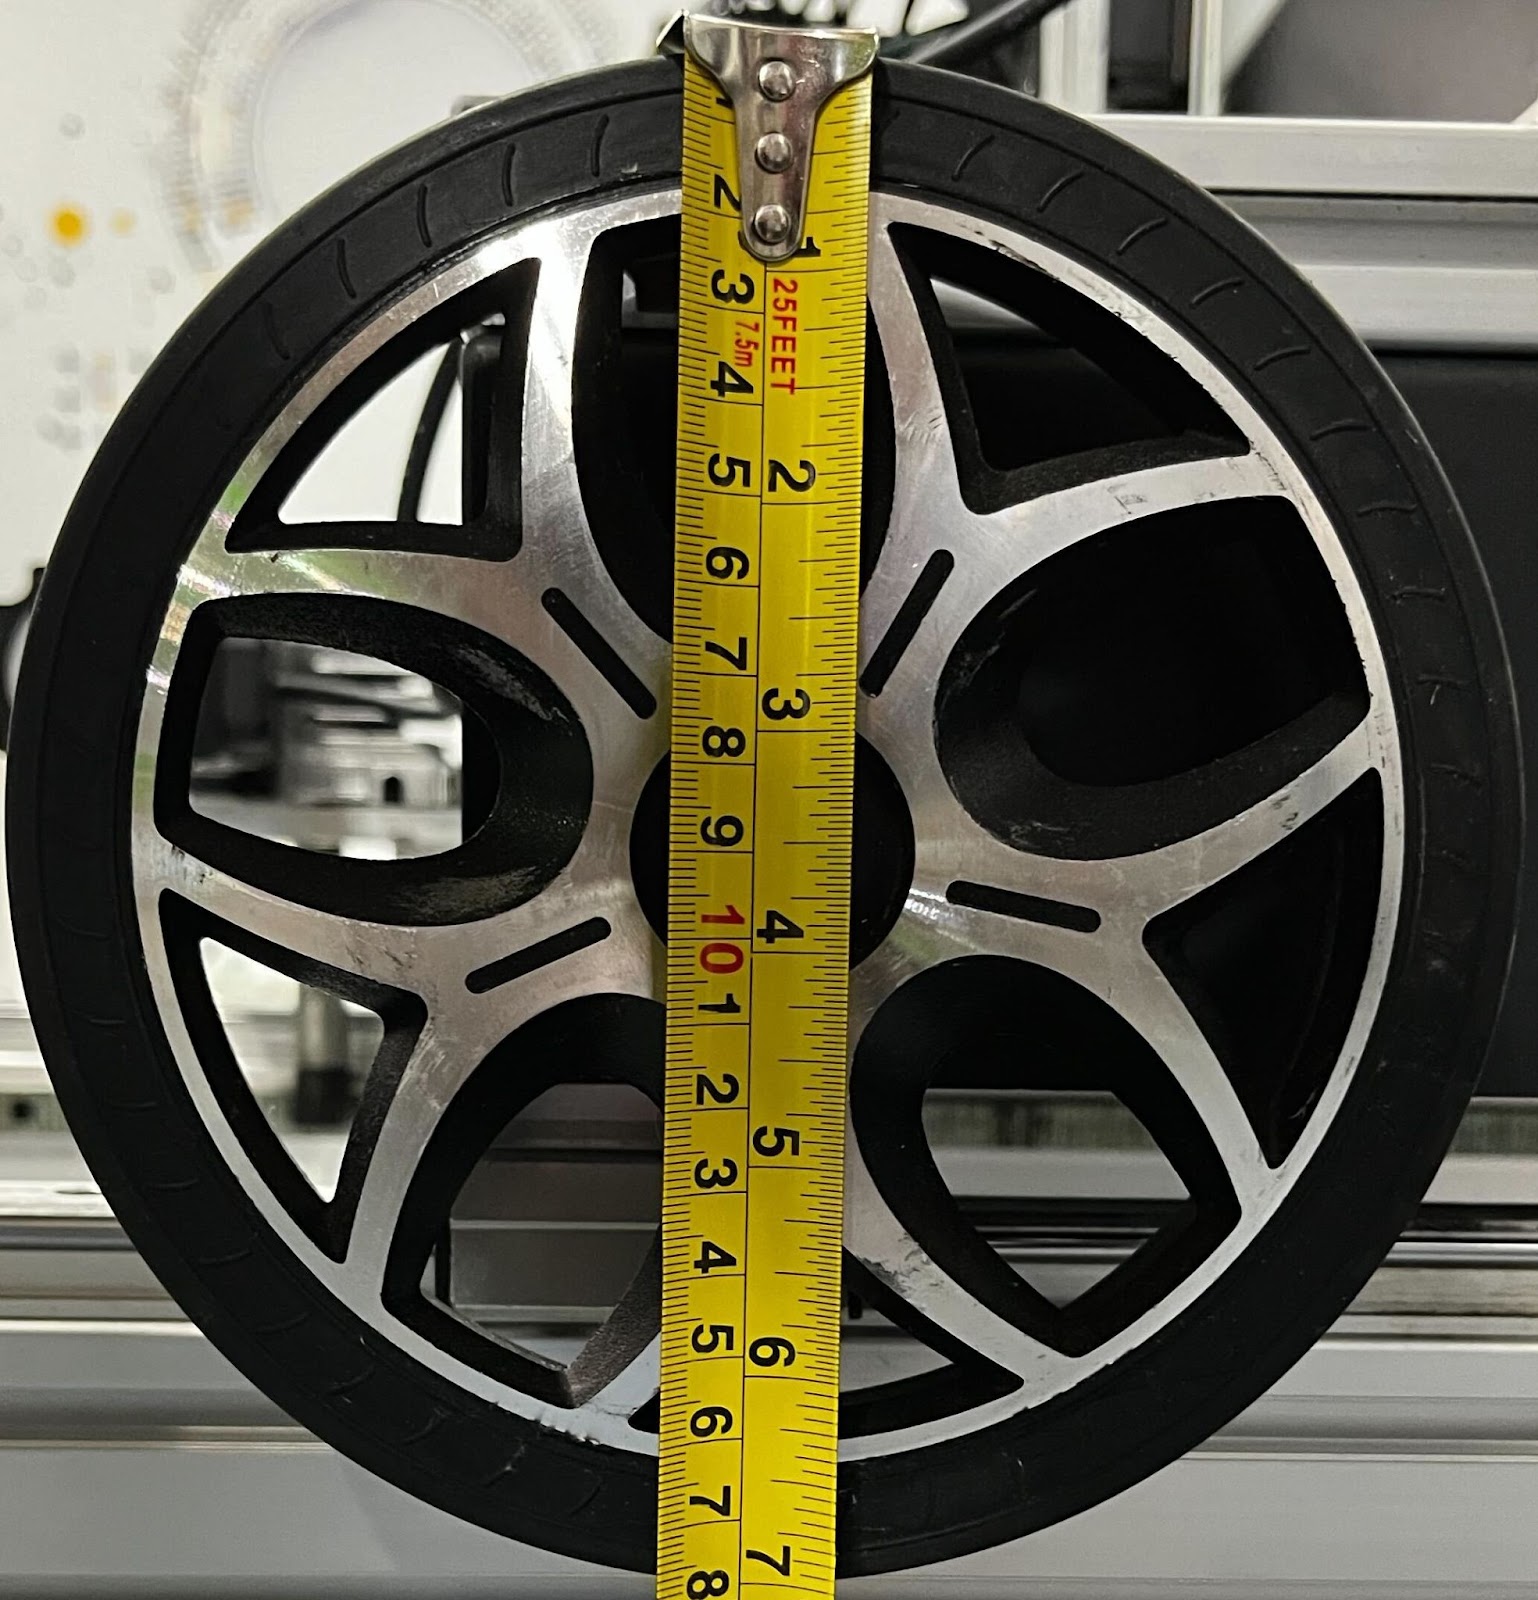
-Wheel 115: For printing on wheels 115mm diameters
-Tap on save and then OK
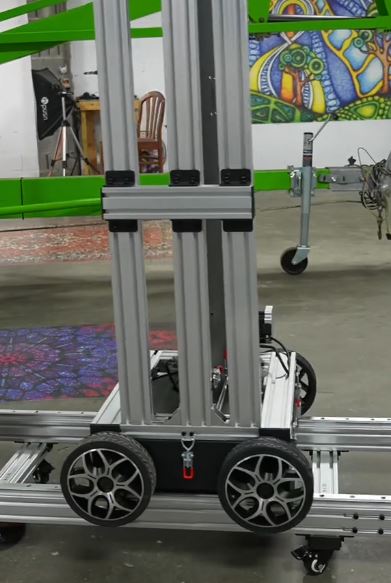
Note: Ensure you connect the appropriate power cable for the rail or wheel, as illustrated in the picture below.
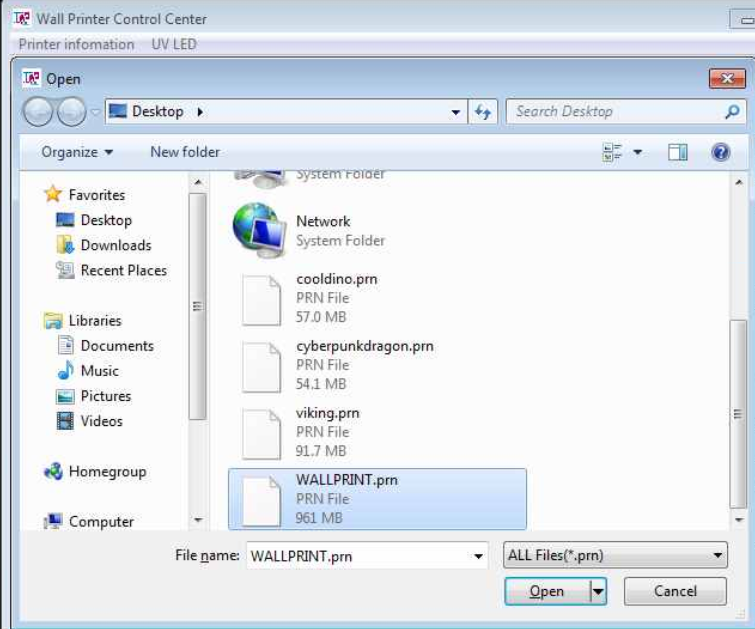
-Tap on "Open File" to browse your files.
-Locate your `.prn` file, tap on it, and then tap "Open."
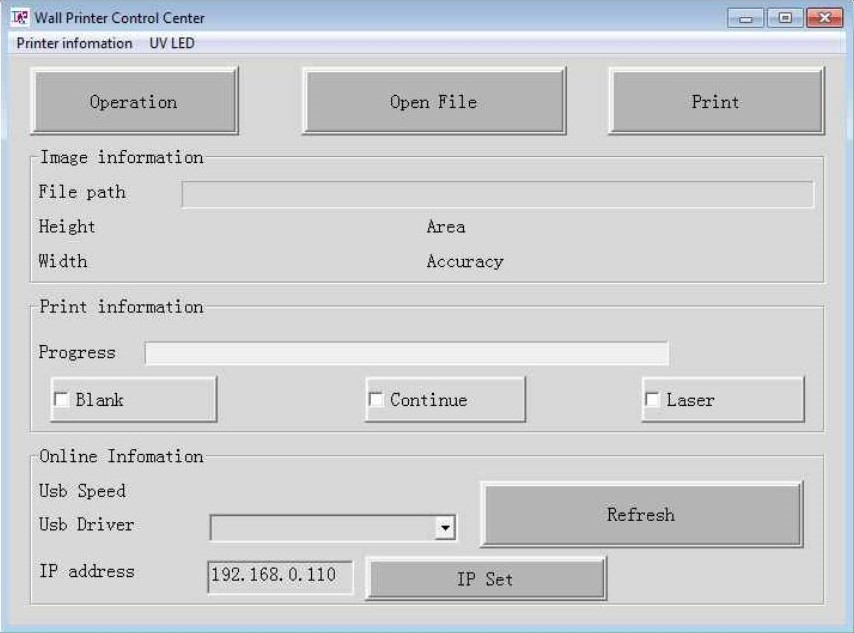
7. Review File Information
-Verify the details displayed on the screen, including:
-File path
-Height and width (in mm)
-Area (in square meters)
-Accuracy
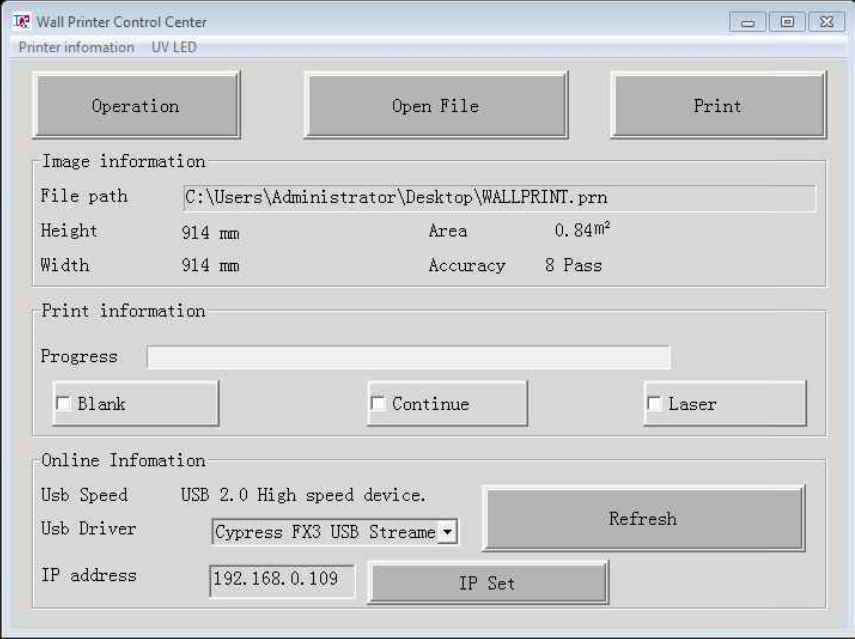
8. Adjust Print Information Options (Optional)**
-Before printing, you can toggle the following options:
-**Blank**: Eliminates blank spaces in the printer's passes. This option saves time but is not mandatory.
-**Continue**: Resumes printing from where you left off if interrupted.
-**Laser**: Starts printing at the point indicated by the laser crosshair. Calibration is required
before each use.
-Ensure the printing area is clear of any obstructions.
-Position the printer in the desired location using the TWP software.
-Ensure the printhead is set to automatic mode for the optimal floor distance (if applicable).
10. Start the Print
-Tap on "Print" to begin the printing process.
Related Articles
WP-UV-T TWP Basic Operations
1-Power on your computer and printhead assembly Note: Power on the print head assembly first before opening TWP; otherwise, the software will not detect the hardware. 2- Double-tap on TWP Control Center. Look for one of these icons on your desktop ...WP-UV-TV2 How to move your printer using a dolly cart
Transporting the WP-UV-T2 requires careful handling to prevent damage to its sensitive components, particularly the motorized belt wheels. Pulling or pushing the printer directly can result in costly damage. Therefore, it is essential to use the ...WP-UV-T How to Adjust The Wall Distance
Before adjusting the Wall Distance, be sure you have correctly placed your Wall Printer. When the printhead is in its fully retracted position (Z Backward), it should be 3 inches from the wall. The Wall Printer's Wall Distance setting is used to ...WP-UV-TV2 How to Adjust The Wall Distance
Before adjusting the Wall Distance, be sure you have correctly placed your Wall Printer. When the printhead is in its fully retracted position (Z Backward), it should be 3 inches from the wall. The Wall Printer's Wall Distance setting is used to ...WP-UV-T How To Remove The Printhead Assembly T-Series
How To Remove The Printhead Assembly T-Series